
Happy PI Day!!!
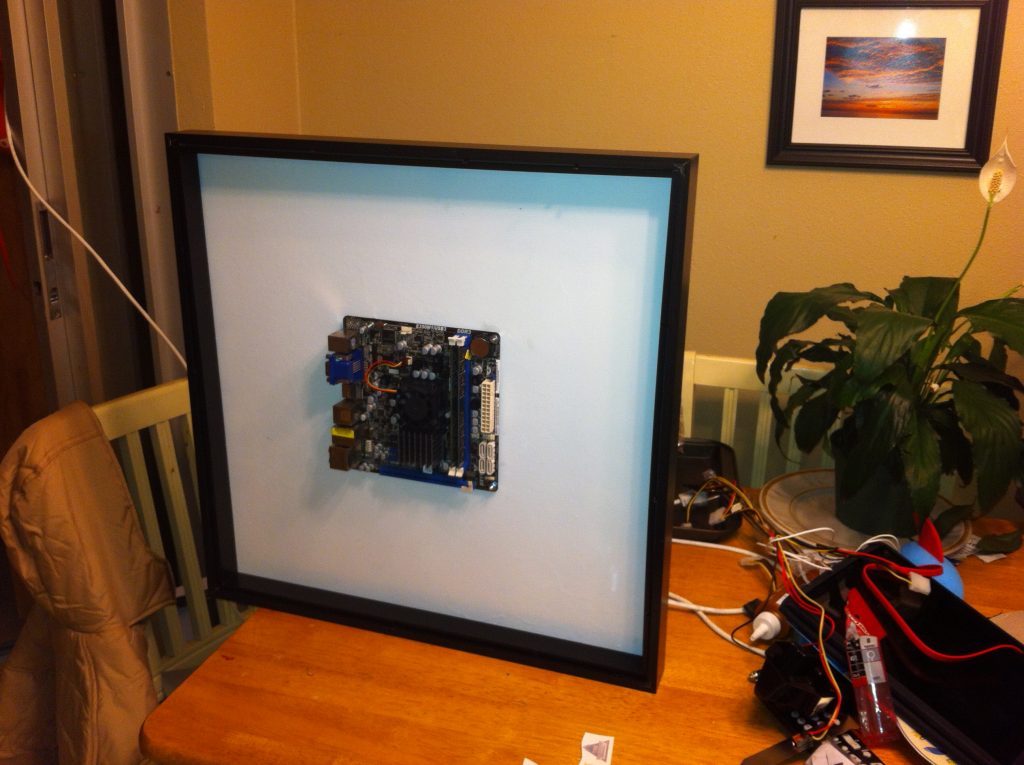
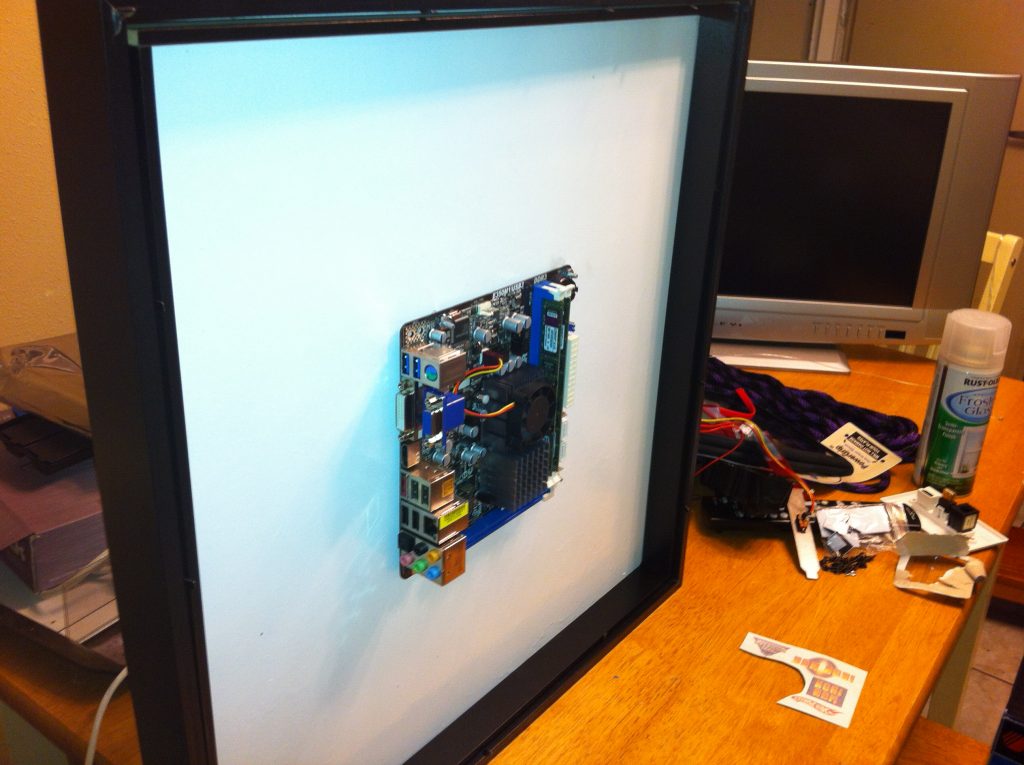
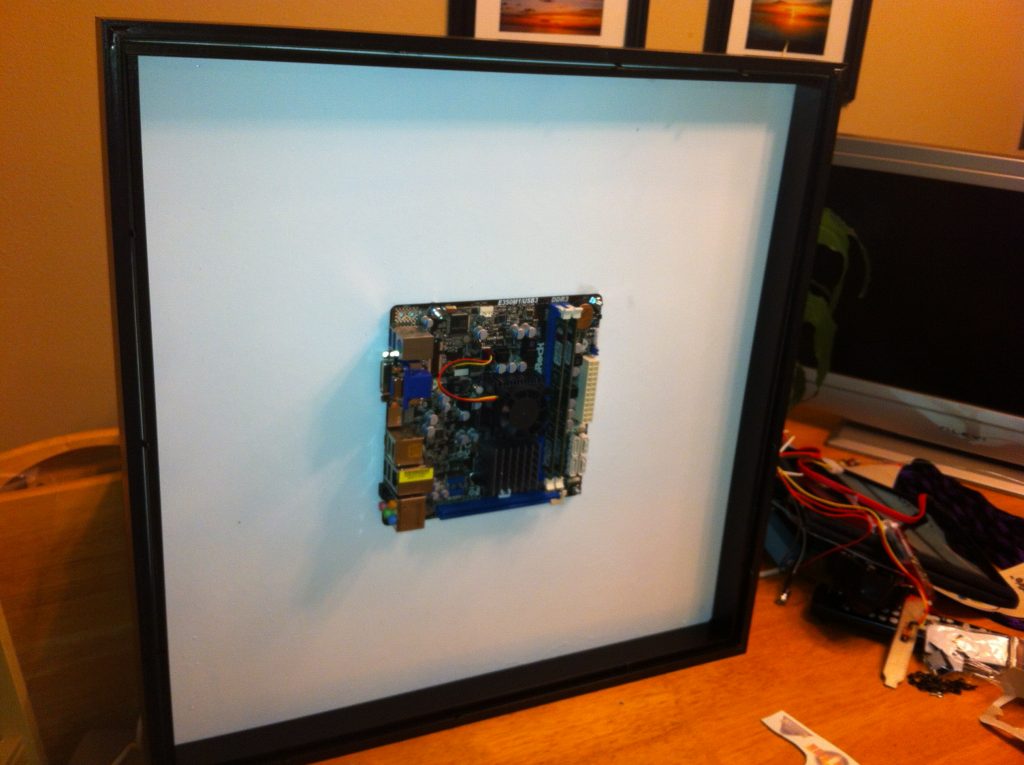
A few years back… ok… like 9 years ago. I built an interesting piece of functional art in my living room. It was my media center pc, mounted in a double picture frame on my wall. This thing served me well for a long time. But now it’s time to upgrade it.
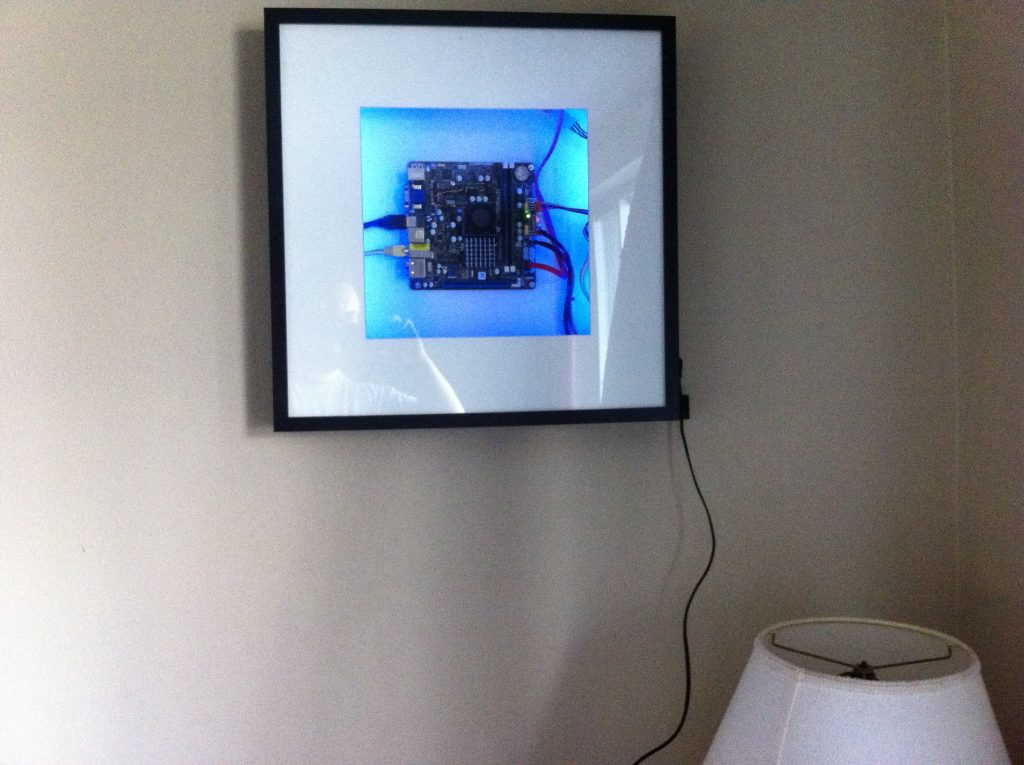
After all this time the ATOM board in there has gotten a little sluggish, the distro isn’t supported, the black lights have gone bad, I think there’s a demon in there. It’s legit struggling.
So how are we going to upgrade it now??!?


Oh good you, you have it under control…
Oh man… I thought you were gone…

You are not a meme…. Let me finish…
Where was I? Oh Yeah. What we are doing to upgrade… So here is the checklist.
- Replace old ATOM board with new raspberry pi
- Replace black light bulbs with RBG led strip.
- Add simple to use RF remote
- Flash PI with OSMC for a distro that will keep updated on a regular basis.
- Add wemos D1 Mini to control LED in frame lighting
- Flash wemos with WLED project for simple easy lighting control
- Add wemos to home automation system to turn on/off lights on schedule
Not a ton of work, but there is some work to be done.. So lets get to it!
Woo do work fool!!!
Not helpful…
Materials List
| 2 Ribba Picture frames |
| Misc wire / perf board |
| RBG led strip |
| Hinges |
| 1 3 port keystone wall plate |
| 1 hdmi keystone jack pass through |
| 1 rj45 keystone jack pass through |
| 1 keystone jack blank |
| 1 5v 10amp power supply (barrel plug) |
| 1 barrel plug |
| 1 usb adapter |
| 1 small pc fan |
| 1 raspberry pi 3/4 |
| 1 usb cable |
| 1 wemos d1 mini |
| LED ribbon cable |
| motherboard stand offs |
| LED connectors |
| OSMC Remote |
So, those picture frames don’t look like what you have….
Yes, I know, remember, I am upgrading from an older build. The goal of the picture frame is to be tall/wide enough to house your board and deep enough (why I suggest 2) that you can mount said board inside it with stand offs. The second important piece with the picture frames is to make sure that you have some matting to hide things behind.
How to create a wall mounted pi media player
Ok. So lets get started.
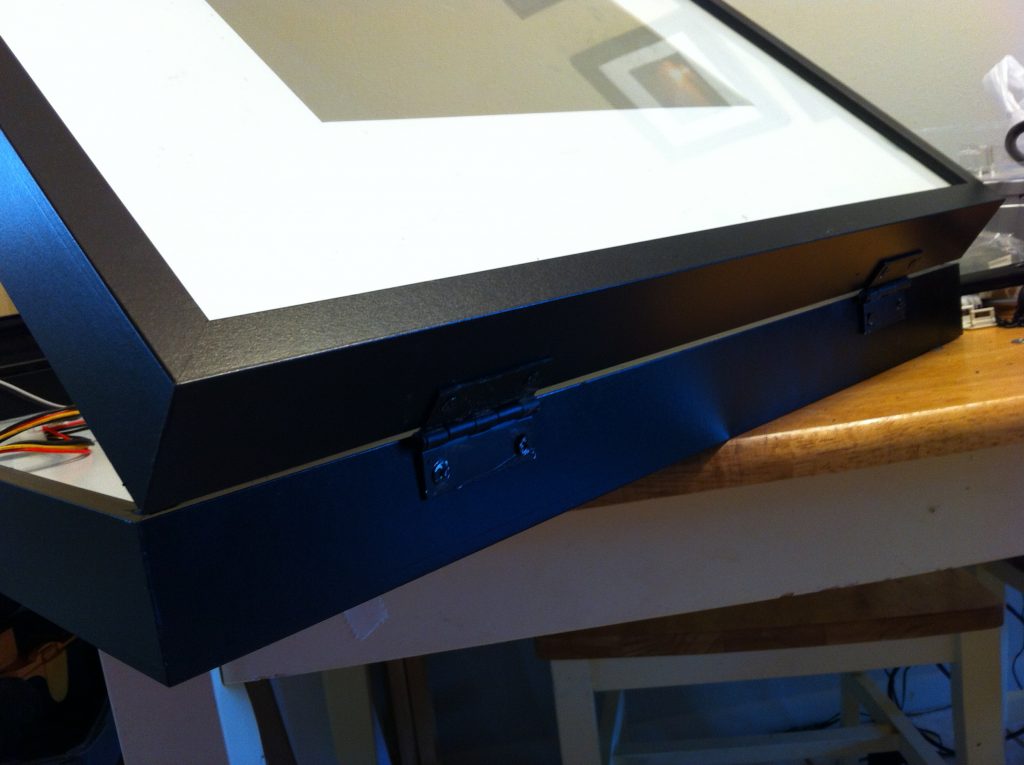
Lets take the 2 picture frames, and stack them, and add some hinges so we have a nice box to work with.
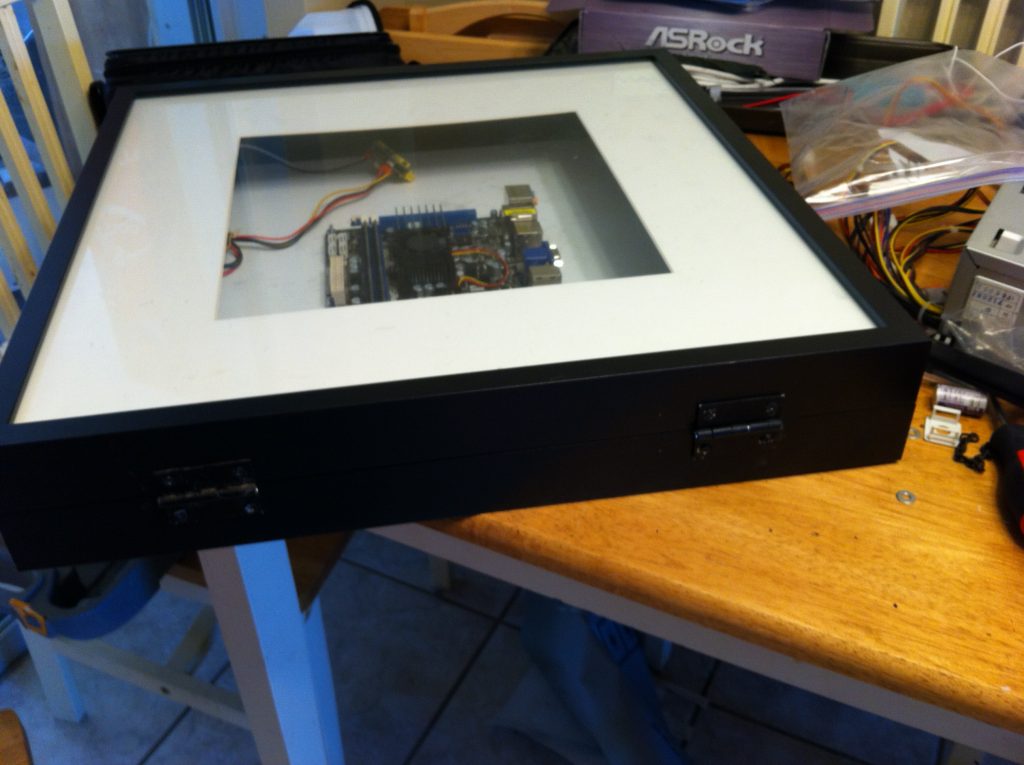
Take the 3 keystone plate and put the hdmi and network pass through it. Take the blank and drill out a hole to fit the barrel plug.
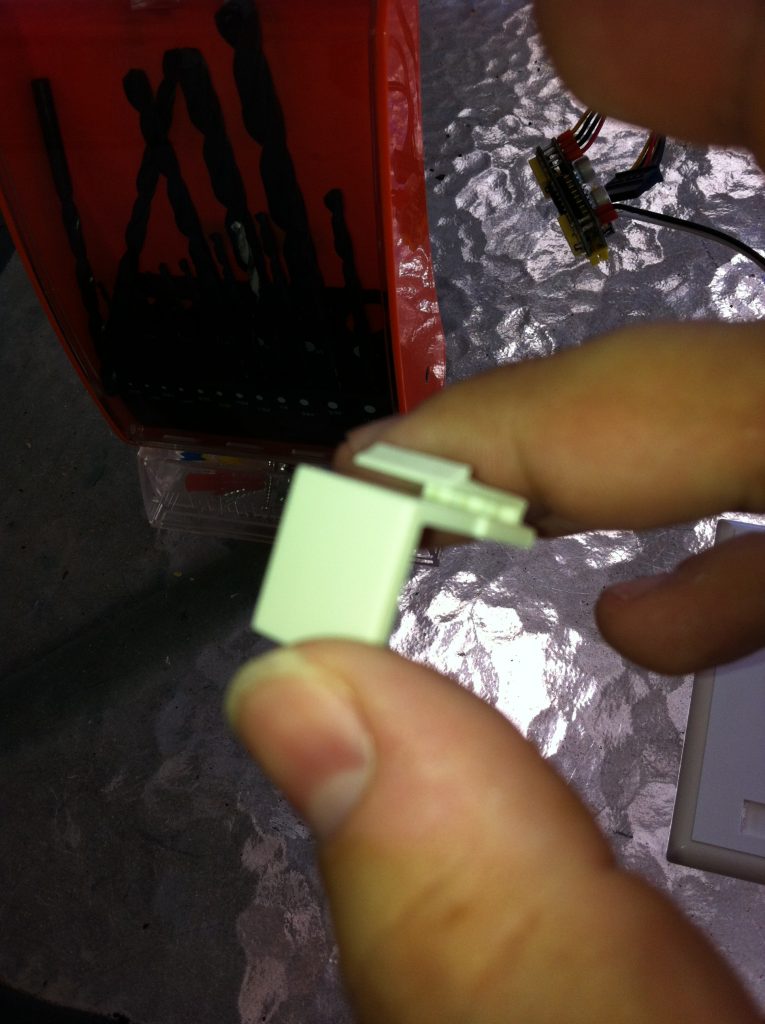
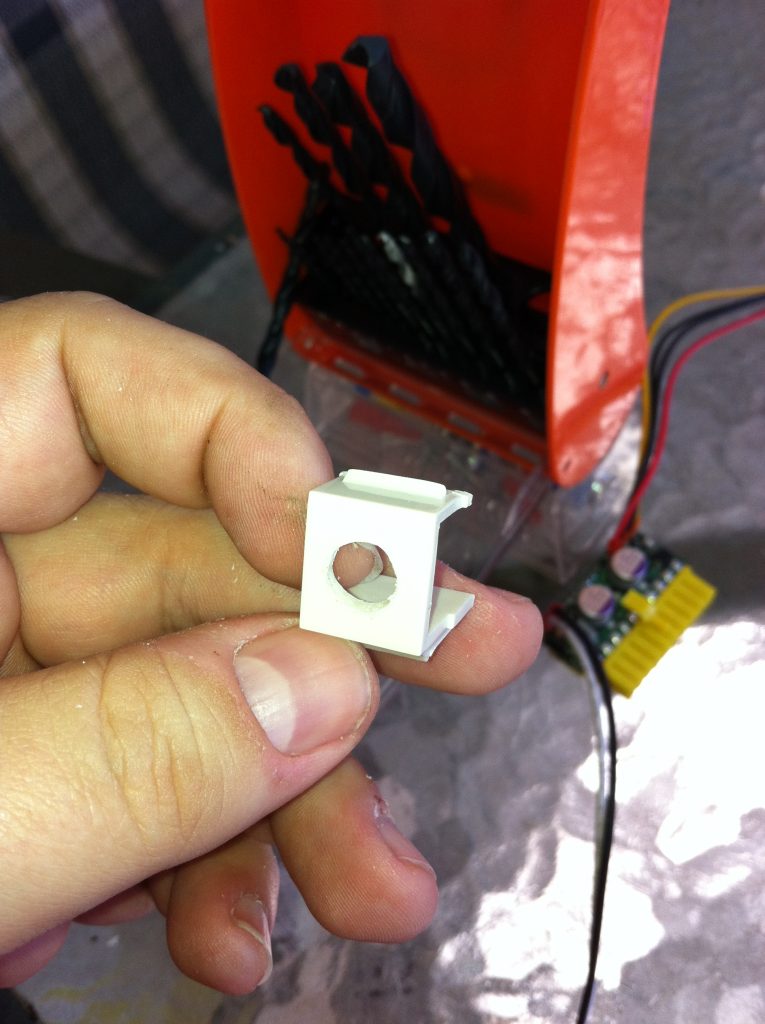
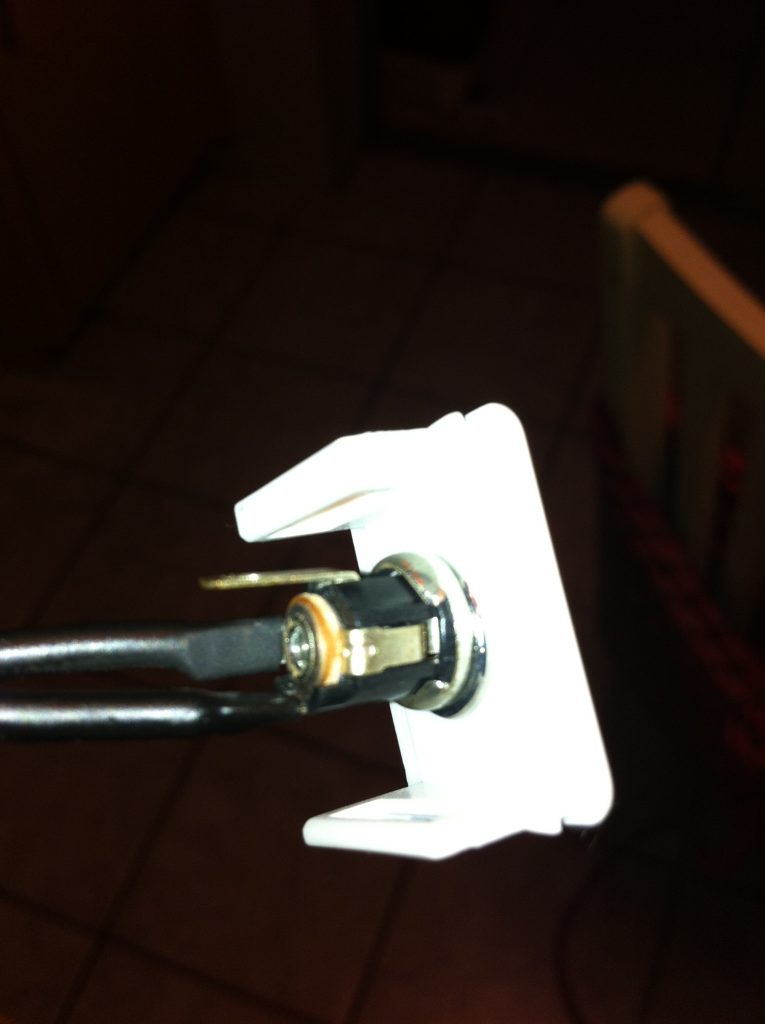
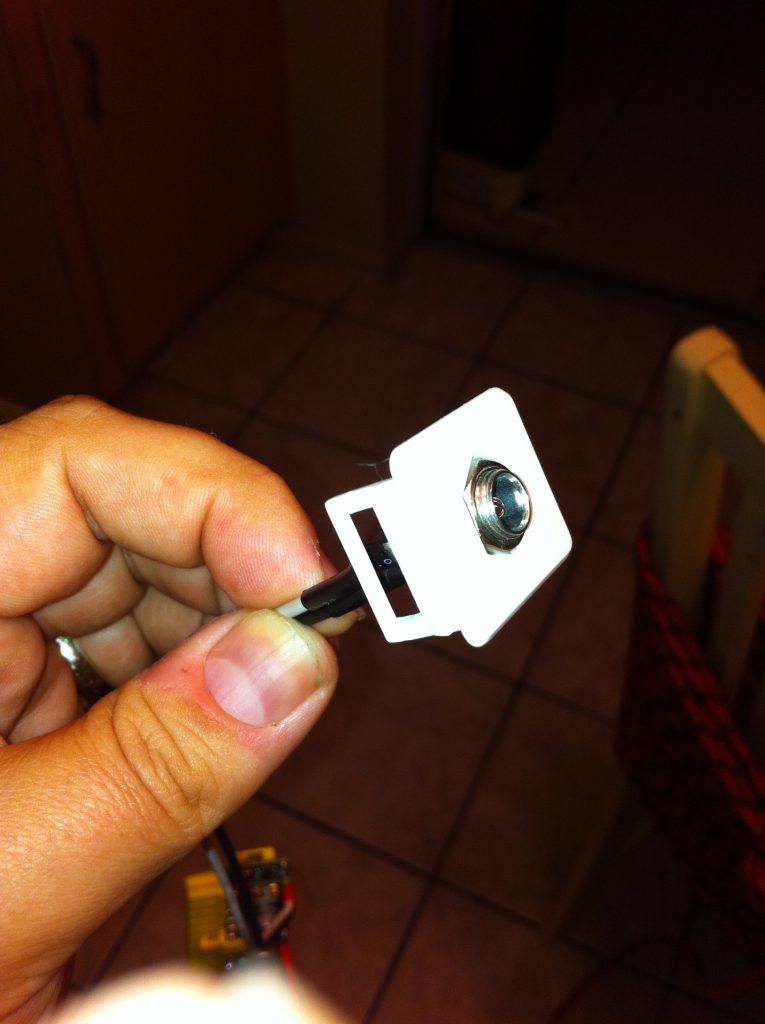
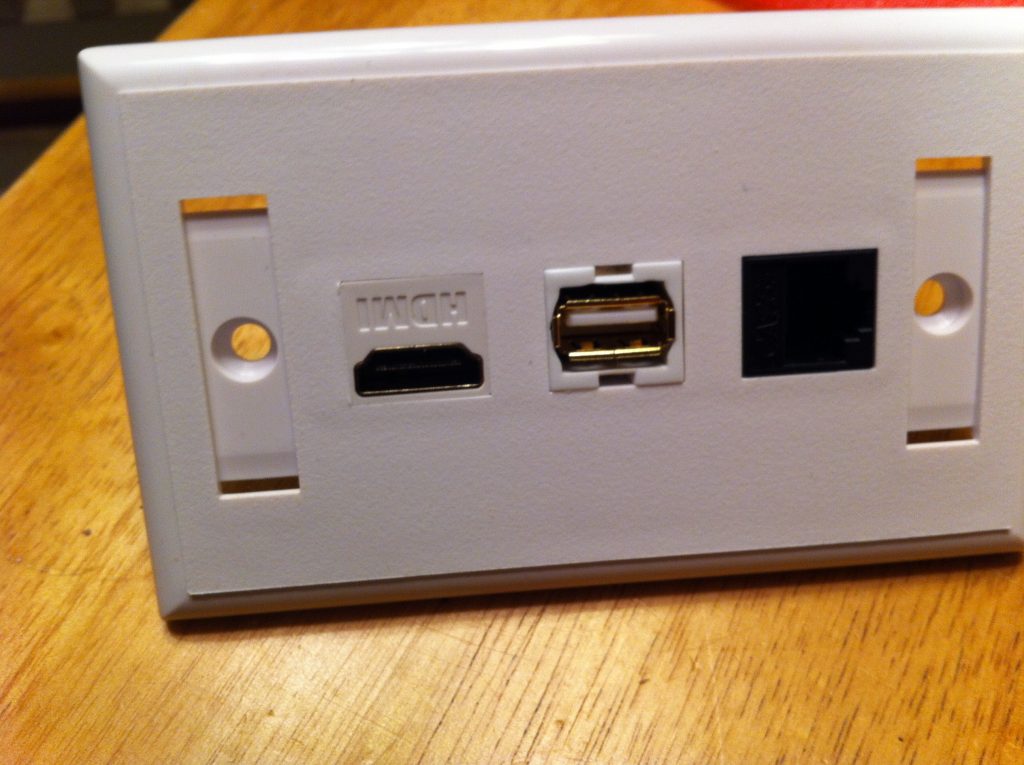
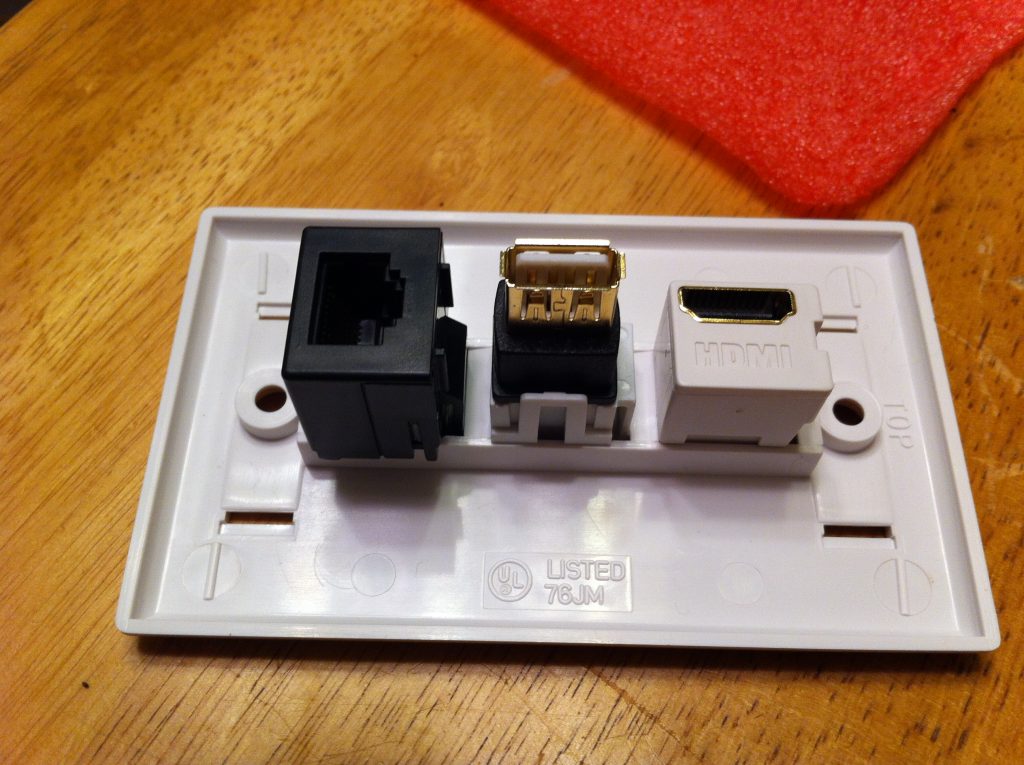
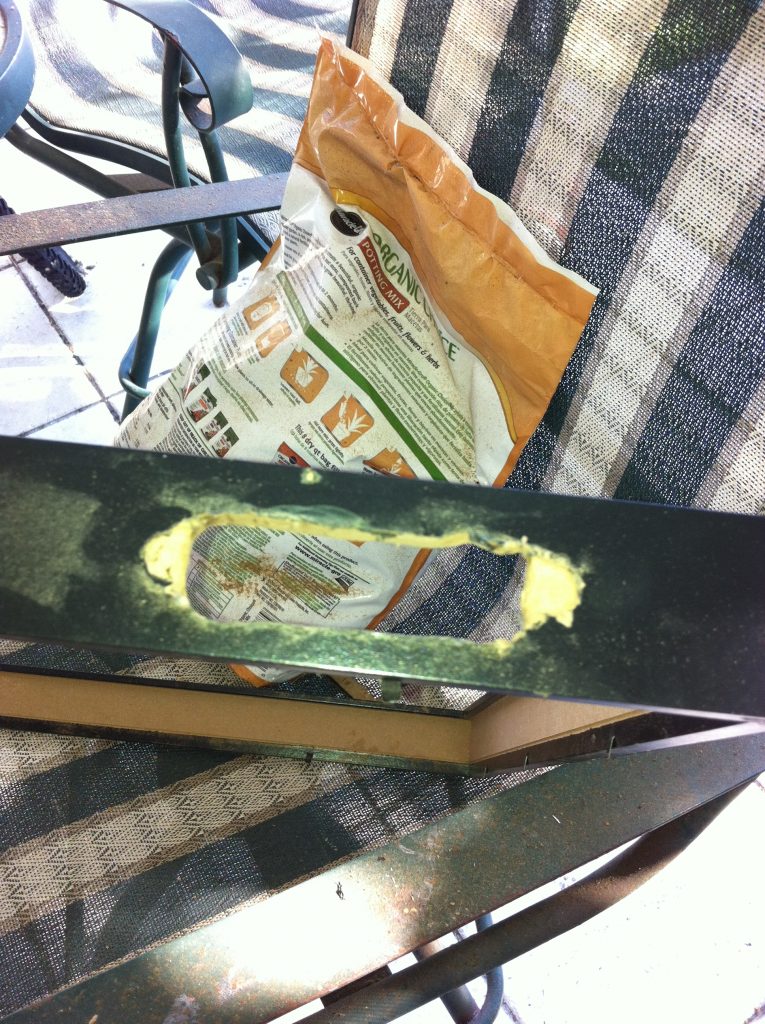
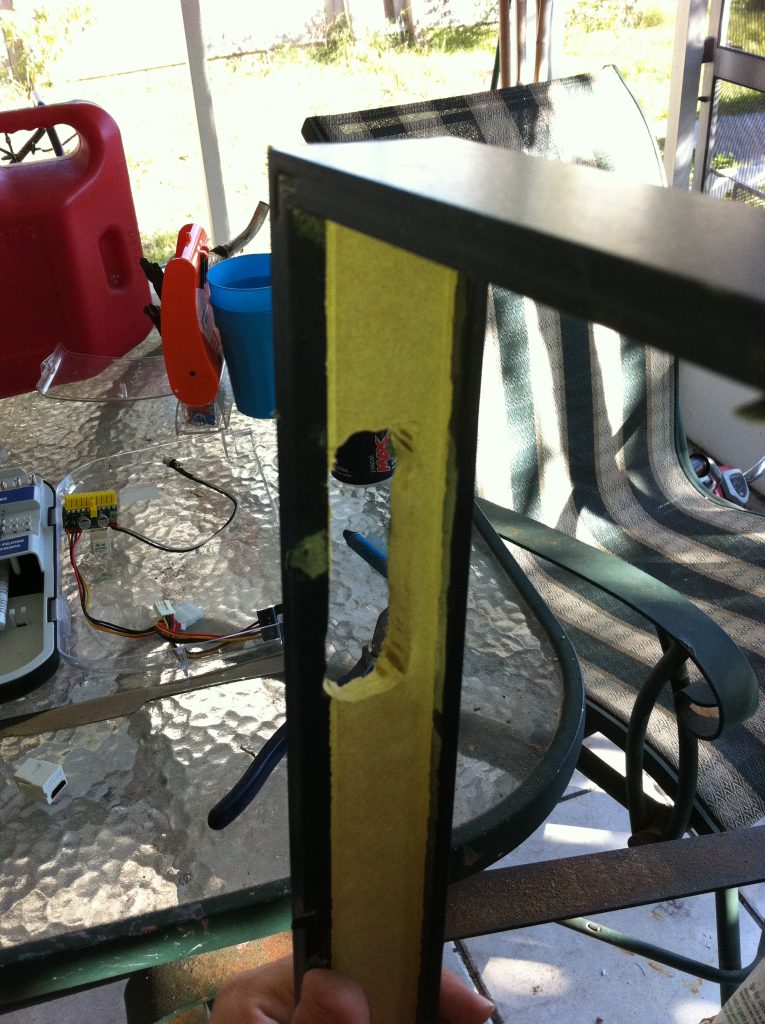
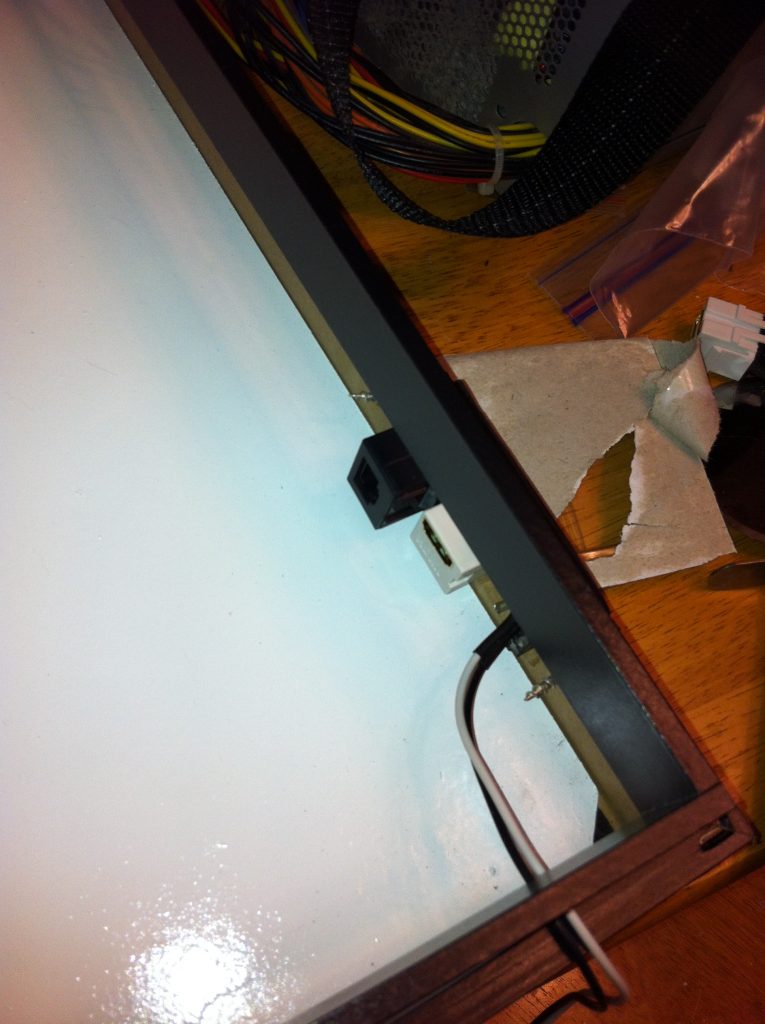
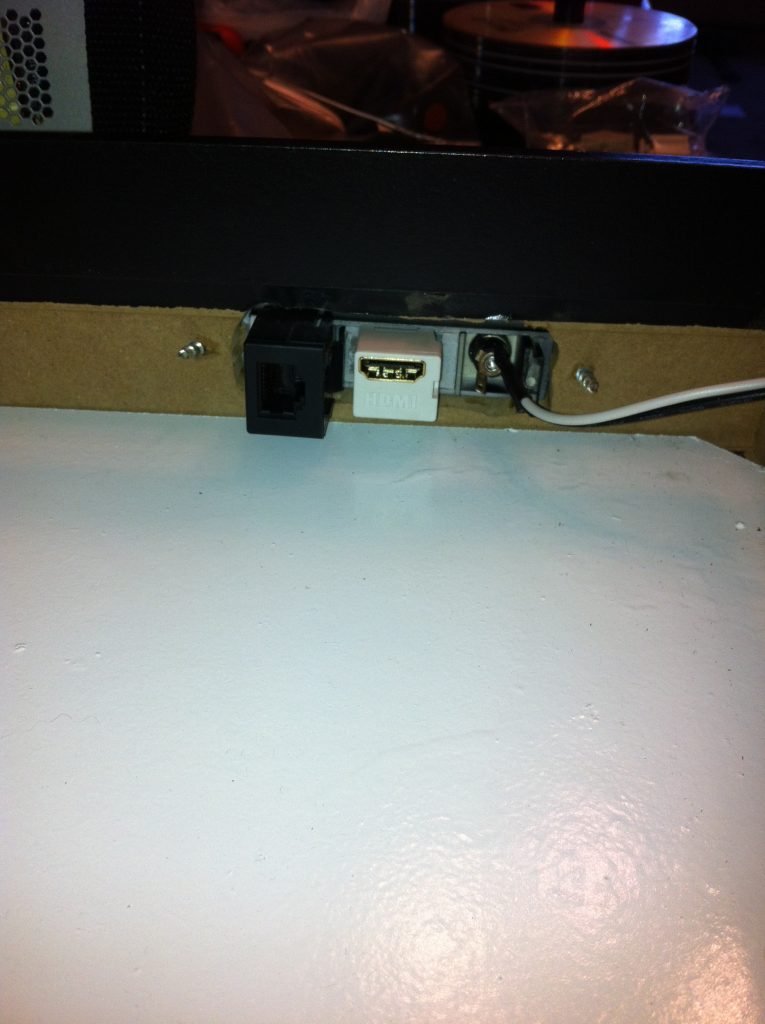
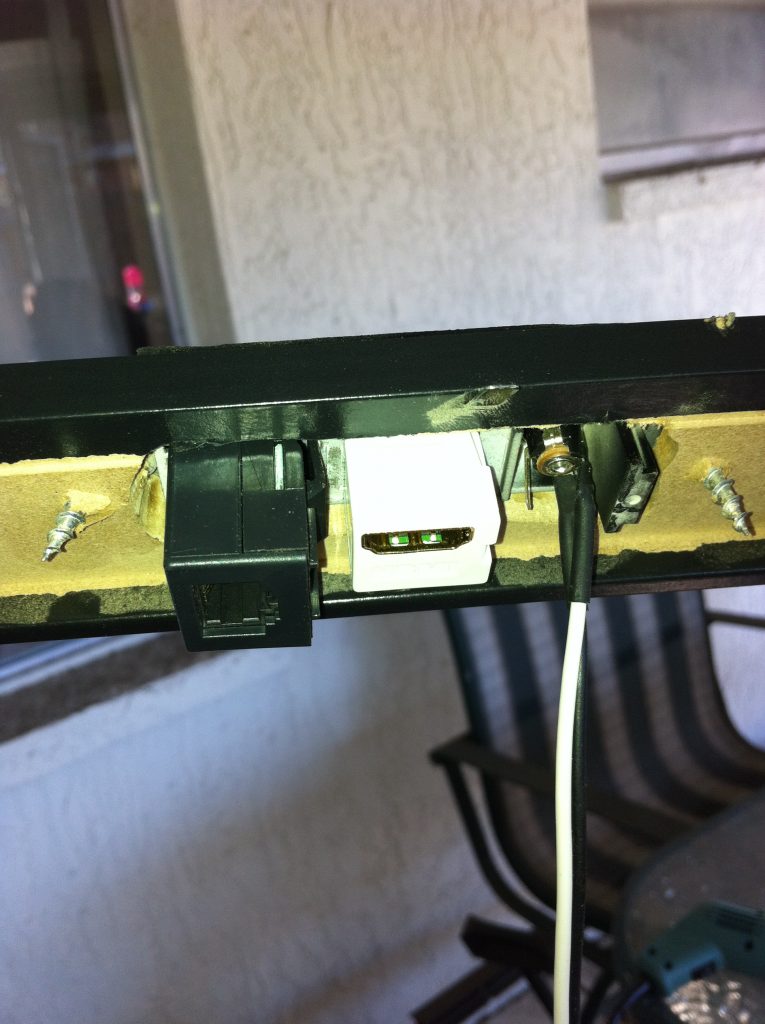
Arrange them however you best see fit. Now with a rotary tool cut around the keystone jacks so that what’s remaining can fit on the side of the frame. I cut around the existing screw holes so they could be reused to fasten to the frame.
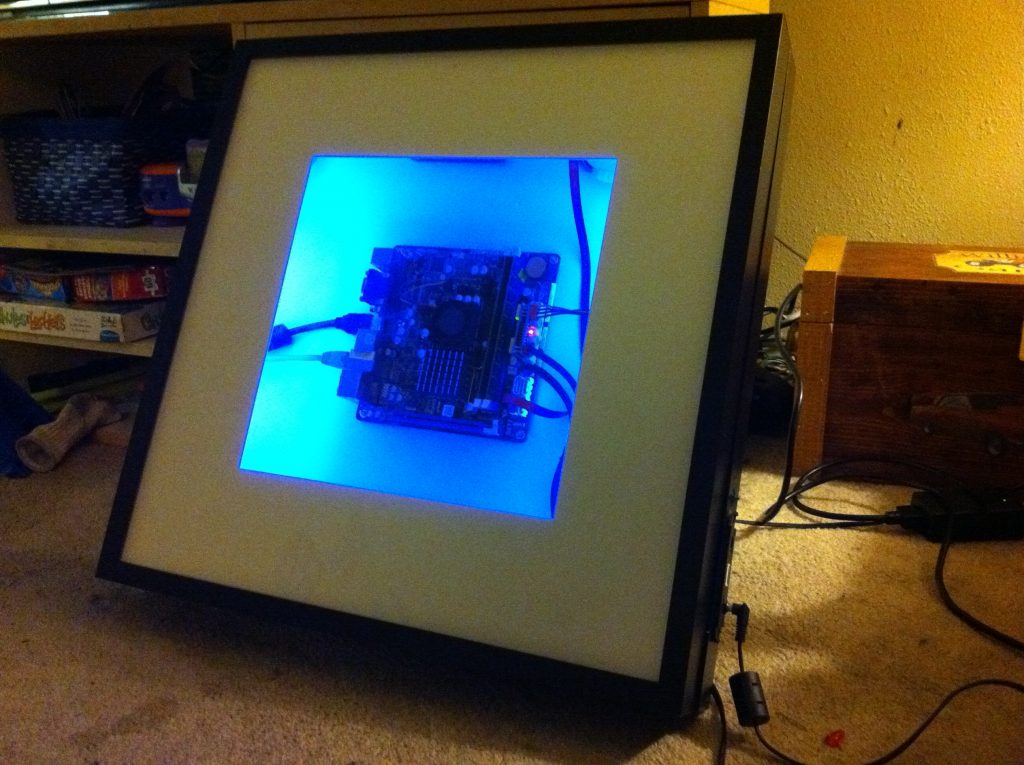
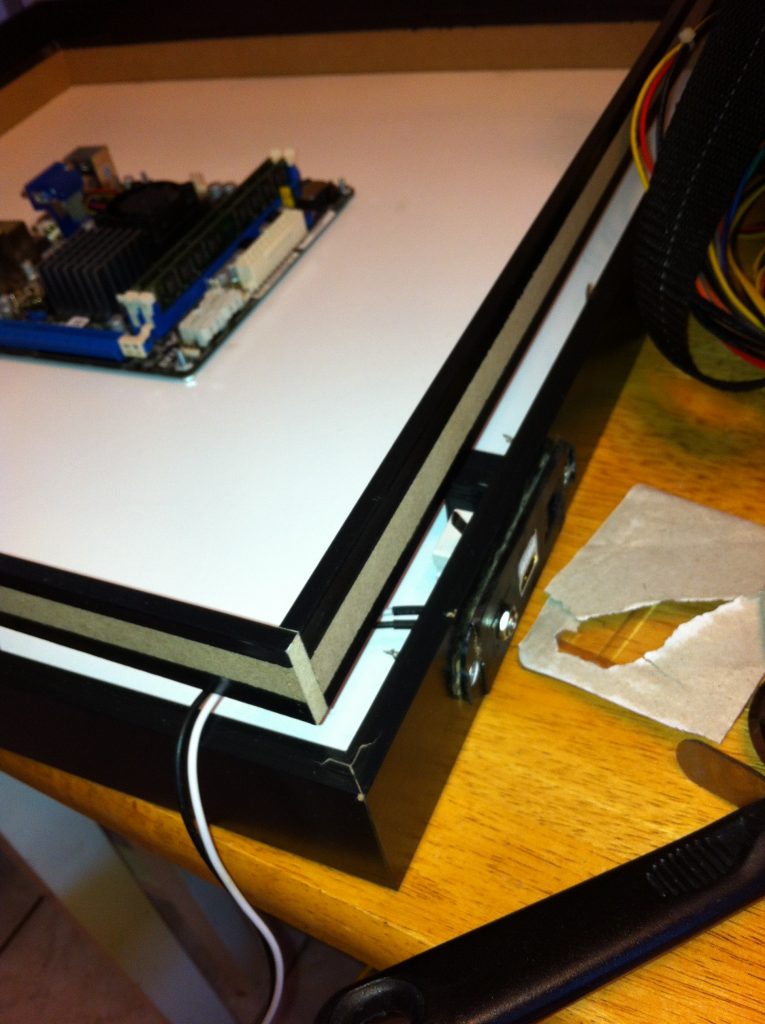
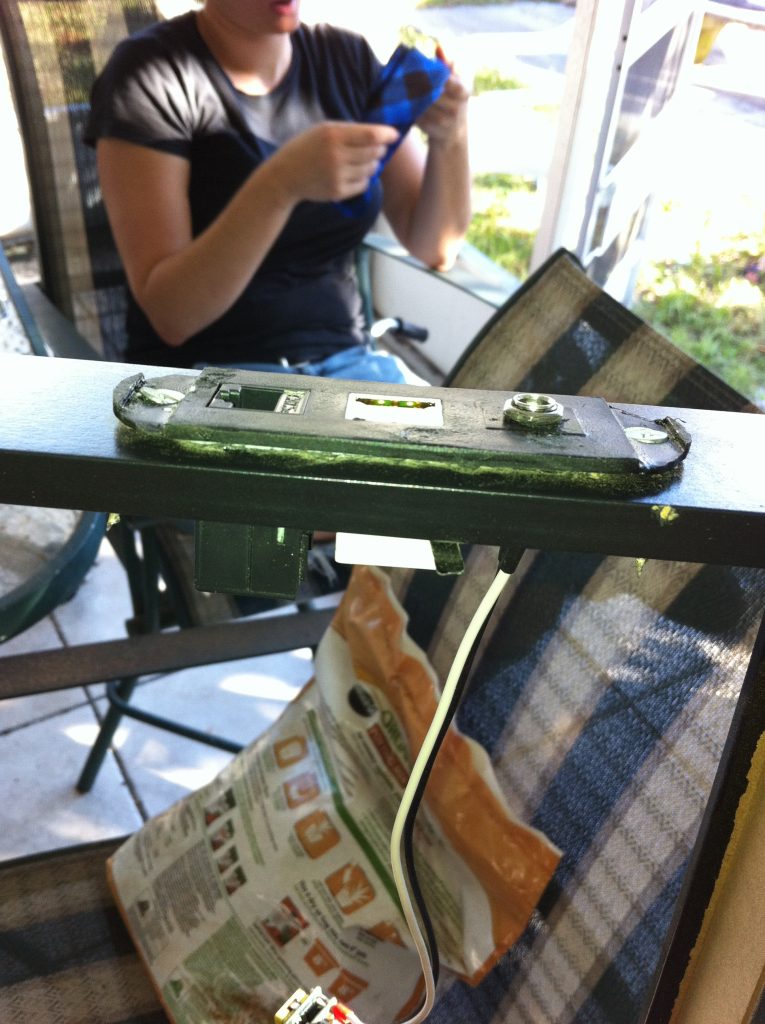
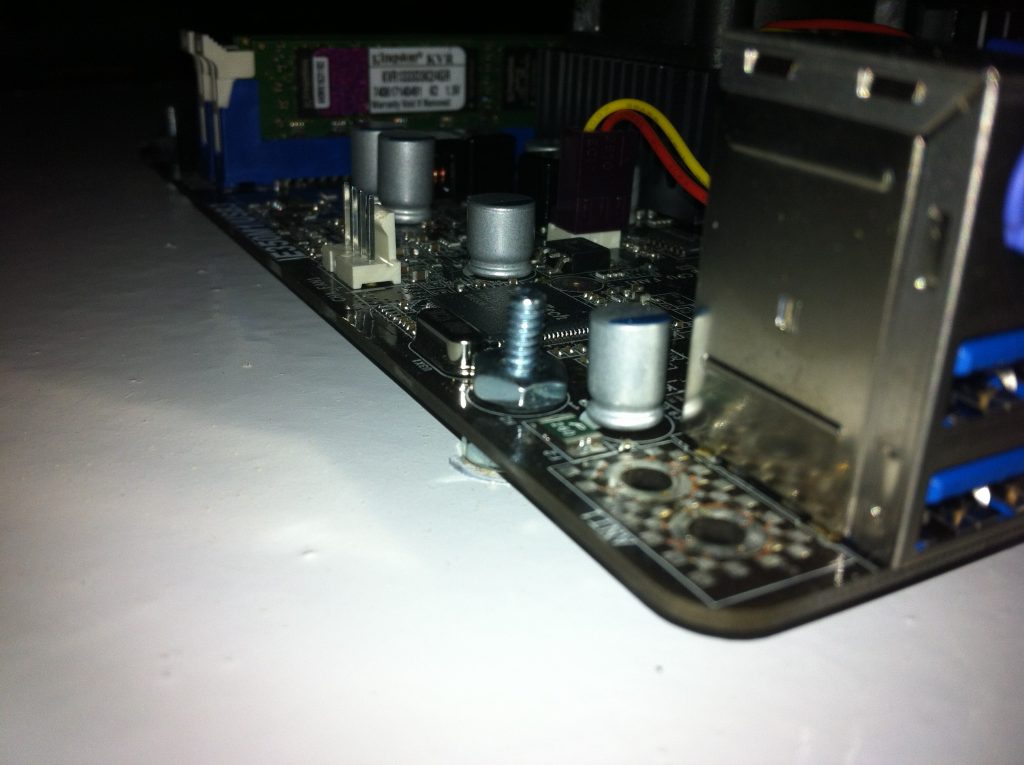
As you can see from the first build you mount the board in the middle and start taking care of the wiring.
You take care of wiring.
*sigh*
Then add some lighting.
<ul class="blocks-gallery-grid">
<li class="blocks-gallery-item">
<figure><img loading="lazy" width="1024" height="765" src="2011-11-25-18.39.42-1024x765.jpg" alt="" data-id="520" data-full-url="2011-11-25-18.39.42-scaled.jpg" data-link="http://crankycoder.net/?attachment_id=520" class="wp-image-520" srcset="2011-11-25-18.39.42-1024x765.jpg 1024w, 2011-11-25-18.39.42-300x224.jpg 300w, 2011-11-25-18.39.42-768x574.jpg 768w, 2011-11-25-18.39.42-1536x1147.jpg 1536w, 2011-11-25-18.39.42-2048x1530.jpg 2048w" sizes="(max-width: 1024px) 100vw, 1024px" /></figure>
</li>
<li class="blocks-gallery-item">
<figure><img loading="lazy" width="765" height="1024" src="2011-11-25-18.39.17-765x1024.jpg" alt="" data-id="519" data-full-url="2011-11-25-18.39.17-scaled.jpg" data-link="http://crankycoder.net/?attachment_id=519" class="wp-image-519" srcset="2011-11-25-18.39.17-765x1024.jpg 765w, 2011-11-25-18.39.17-224x300.jpg 224w, 2011-11-25-18.39.17-768x1028.jpg 768w, 2011-11-25-18.39.17-1147x1536.jpg 1147w, 2011-11-25-18.39.17-1530x2048.jpg 1530w, 2011-11-25-18.39.17-scaled.jpg 1912w" sizes="(max-width: 765px) 100vw, 765px" /></figure>
</li>
<li class="blocks-gallery-item">
<figure><img loading="lazy" width="1024" height="765" src="2011-11-25-18.30.53-1024x765.jpg" alt="" data-id="518" data-full-url="2011-11-25-18.30.53-scaled.jpg" data-link="http://crankycoder.net/?attachment_id=518" class="wp-image-518" srcset="2011-11-25-18.30.53-1024x765.jpg 1024w, 2011-11-25-18.30.53-300x224.jpg 300w, 2011-11-25-18.30.53-768x574.jpg 768w, 2011-11-25-18.30.53-1536x1147.jpg 1536w, 2011-11-25-18.30.53-2048x1530.jpg 2048w" sizes="(max-width: 1024px) 100vw, 1024px" /></figure>
</li>
</ul></figure>
<p>
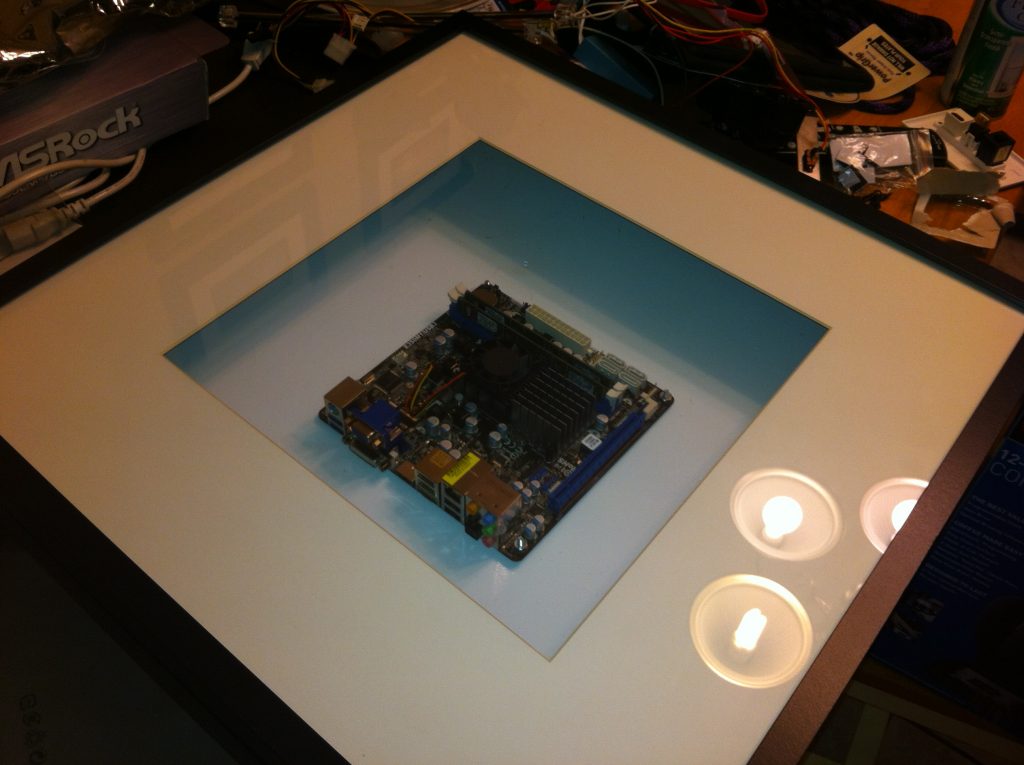
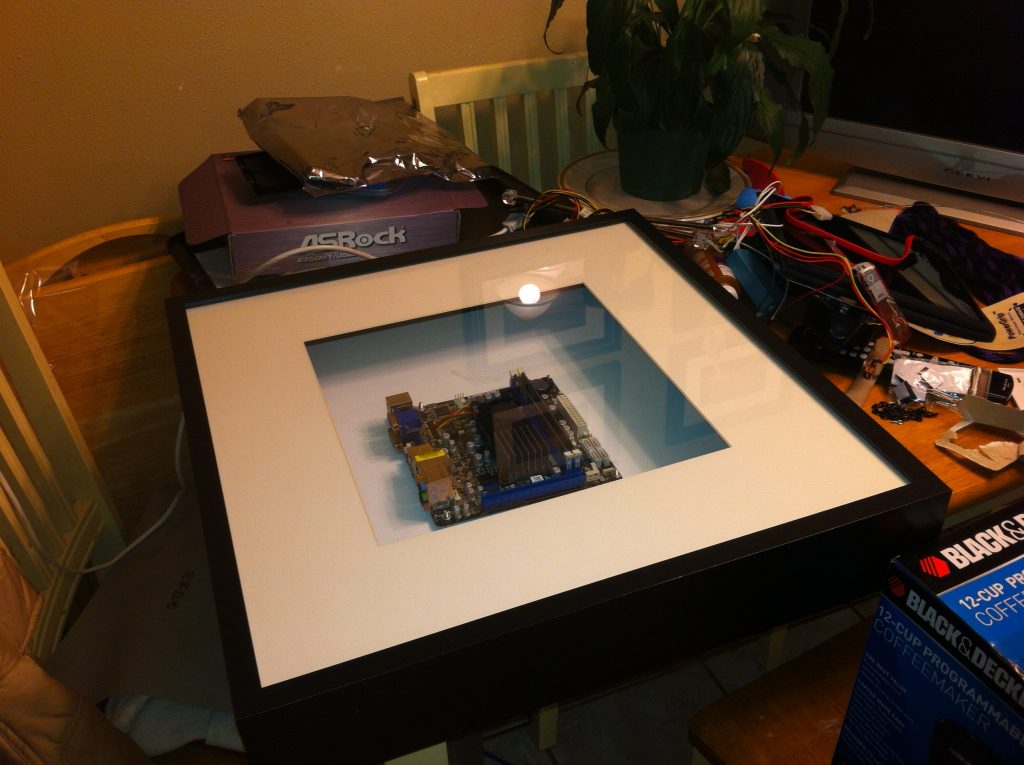
Here are few shots of the build back in the day.
</p><figure class="wp-block-gallery columns-3 is-cropped">
<ul class="blocks-gallery-grid">
<li class="blocks-gallery-item">
<figure><img loading="lazy" width="1024" height="765" src="2011-11-13-20.36.57-1024x765.jpg" alt="" data-id="507" data-full-url="2011-11-13-20.36.57-scaled.jpg" data-link="http://crankycoder.net/?attachment_id=507" class="wp-image-507" srcset="2011-11-13-20.36.57-1024x765.jpg 1024w, 2011-11-13-20.36.57-300x224.jpg 300w, 2011-11-13-20.36.57-768x574.jpg 768w, 2011-11-13-20.36.57-1536x1147.jpg 1536w, 2011-11-13-20.36.57-2048x1530.jpg 2048w" sizes="(max-width: 1024px) 100vw, 1024px" /></figure>
</li>
<li class="blocks-gallery-item">
<figure><img loading="lazy" width="1024" height="765" src="2012-02-11-16.31.07-1024x765.jpg" alt="" data-id="549" data-full-url="2012-02-11-16.31.07-scaled.jpg" data-link="http://crankycoder.net/?attachment_id=549" class="wp-image-549" srcset="2012-02-11-16.31.07-1024x765.jpg 1024w, 2012-02-11-16.31.07-300x224.jpg 300w, 2012-02-11-16.31.07-768x574.jpg 768w, 2012-02-11-16.31.07-1536x1147.jpg 1536w, 2012-02-11-16.31.07-2048x1530.jpg 2048w" sizes="(max-width: 1024px) 100vw, 1024px" /></figure>
</li>
<li class="blocks-gallery-item">
<figure><img loading="lazy" width="1024" height="765" src="2012-02-11-16.30.39-1024x765.jpg" alt="" data-id="548" data-full-url="2012-02-11-16.30.39-scaled.jpg" data-link="http://crankycoder.net/?attachment_id=548" class="wp-image-548" srcset="2012-02-11-16.30.39-1024x765.jpg 1024w, 2012-02-11-16.30.39-300x224.jpg 300w, 2012-02-11-16.30.39-768x574.jpg 768w, 2012-02-11-16.30.39-1536x1147.jpg 1536w, 2012-02-11-16.30.39-2048x1530.jpg 2048w" sizes="(max-width: 1024px) 100vw, 1024px" /></figure>
</li>
<li class="blocks-gallery-item">
<figure><img loading="lazy" width="1024" height="765" src="2012-02-02-20.19.23-1024x765.jpg" alt="" data-id="547" data-full-url="2012-02-02-20.19.23-scaled.jpg" data-link="http://crankycoder.net/?attachment_id=547" class="wp-image-547" srcset="2012-02-02-20.19.23-1024x765.jpg 1024w, 2012-02-02-20.19.23-300x224.jpg 300w, 2012-02-02-20.19.23-768x574.jpg 768w, 2012-02-02-20.19.23-1536x1147.jpg 1536w, 2012-02-02-20.19.23-2048x1530.jpg 2048w" sizes="(max-width: 1024px) 100vw, 1024px" /></figure>
</li>
<li class="blocks-gallery-item">
<figure><img loading="lazy" width="1024" height="765" src="2011-11-25-18.39.42-1024x765.jpg" alt="" data-id="520" data-full-url="2011-11-25-18.39.42-scaled.jpg" data-link="http://crankycoder.net/?attachment_id=520" class="wp-image-520" srcset="2011-11-25-18.39.42-1024x765.jpg 1024w, 2011-11-25-18.39.42-300x224.jpg 300w, 2011-11-25-18.39.42-768x574.jpg 768w, 2011-11-25-18.39.42-1536x1147.jpg 1536w, 2011-11-25-18.39.42-2048x1530.jpg 2048w" sizes="(max-width: 1024px) 100vw, 1024px" /></figure>
</li>
<li class="blocks-gallery-item">
<figure><img loading="lazy" width="765" height="1024" src="2011-11-25-18.39.17-765x1024.jpg" alt="" data-id="519" data-full-url="2011-11-25-18.39.17-scaled.jpg" data-link="http://crankycoder.net/?attachment_id=519" class="wp-image-519" srcset="2011-11-25-18.39.17-765x1024.jpg 765w, 2011-11-25-18.39.17-224x300.jpg 224w, 2011-11-25-18.39.17-768x1028.jpg 768w, 2011-11-25-18.39.17-1147x1536.jpg 1147w, 2011-11-25-18.39.17-1530x2048.jpg 1530w, 2011-11-25-18.39.17-scaled.jpg 1912w" sizes="(max-width: 765px) 100vw, 765px" /></figure>
</li>
<li class="blocks-gallery-item">
<figure><img loading="lazy" width="1024" height="765" src="Photo-12-02-11-16-31-07-2281-1024x765.jpg" alt="" data-id="487" data-full-url="Photo-12-02-11-16-31-07-2281-scaled.jpg" data-link="http://crankycoder.net/?attachment_id=487" class="wp-image-487" srcset="Photo-12-02-11-16-31-07-2281-1024x765.jpg 1024w, Photo-12-02-11-16-31-07-2281-300x224.jpg 300w, Photo-12-02-11-16-31-07-2281-768x574.jpg 768w, Photo-12-02-11-16-31-07-2281-1536x1147.jpg 1536w, Photo-12-02-11-16-31-07-2281-2048x1530.jpg 2048w" sizes="(max-width: 1024px) 100vw, 1024px" /></figure>
</li>
<li class="blocks-gallery-item">
<figure><img loading="lazy" width="1024" height="765" src="Photo-12-02-02-20-19-23-1961-1024x765.jpg" alt="" data-id="486" data-full-url="Photo-12-02-02-20-19-23-1961-scaled.jpg" data-link="http://crankycoder.net/?attachment_id=486" class="wp-image-486" srcset="Photo-12-02-02-20-19-23-1961-1024x765.jpg 1024w, Photo-12-02-02-20-19-23-1961-300x224.jpg 300w, Photo-12-02-02-20-19-23-1961-768x574.jpg 768w, Photo-12-02-02-20-19-23-1961-1536x1147.jpg 1536w, Photo-12-02-02-20-19-23-1961-2048x1530.jpg 2048w" sizes="(max-width: 1024px) 100vw, 1024px" /></figure>
</li>
</ul></figure>
<p>
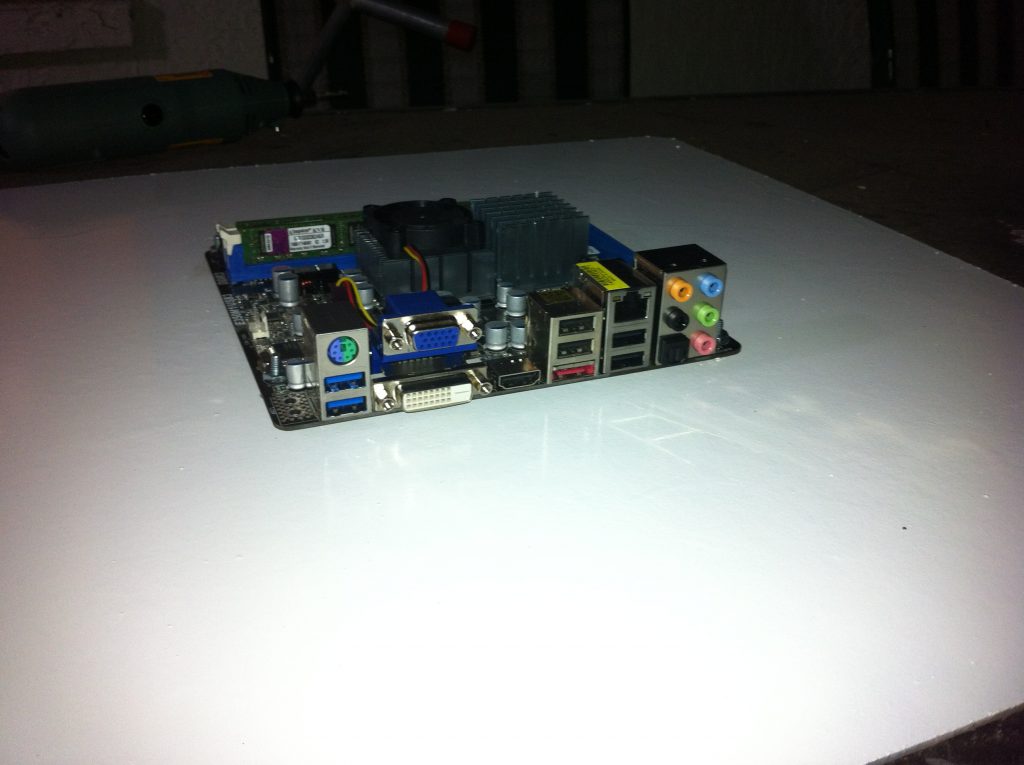
So now, we move to the upgrades. We are removing the board and and replacing with a Raspberry Pi.
</p>
<h2>
Upgrades to move to Raspberry Pi
</h2>
<p>
Now since I have some LED strip, a wemos d1 and a raspberry pi to power, I am going to create a power distribution board.
</p><figure class="wp-block-image size-large">
<img loading="lazy" width="1024" height="512" src="raspi-power-1024x512.jpg" alt="" class="wp-image-551" srcset="raspi-power-1024x512.jpg 1024w, raspi-power-300x150.jpg 300w, raspi-power-768x384.jpg 768w, raspi-power-1536x768.jpg 1536w, raspi-power.jpg 1680w" sizes="(max-width: 1024px) 100vw, 1024px" /></figure>
<p>
</p><figure class="wp-block-image size-large">
<img loading="lazy" width="768" height="1024" src="21-03-13-22-21-52-6386-768x1024.jpg" alt="" class="wp-image-561" srcset="21-03-13-22-21-52-6386-768x1024.jpg 768w, 21-03-13-22-21-52-6386-225x300.jpg 225w, 21-03-13-22-21-52-6386-1152x1536.jpg 1152w, 21-03-13-22-21-52-6386-1536x2048.jpg 1536w, 21-03-13-22-21-52-6386-scaled.jpg 1920w" sizes="(max-width: 768px) 100vw, 768px" /></figure>
<p>
Wire up our new LED strip instead of the old blacklights.
</p><figure class="wp-block-image size-large">
<img loading="lazy" width="768" height="1024" src="21-03-13-22-21-57-6387-768x1024.jpg" alt="" class="wp-image-562" srcset="21-03-13-22-21-57-6387-768x1024.jpg 768w, 21-03-13-22-21-57-6387-225x300.jpg 225w, 21-03-13-22-21-57-6387-1152x1536.jpg 1152w, 21-03-13-22-21-57-6387-1536x2048.jpg 1536w, 21-03-13-22-21-57-6387-scaled.jpg 1920w" sizes="(max-width: 768px) 100vw, 768px" /></figure>
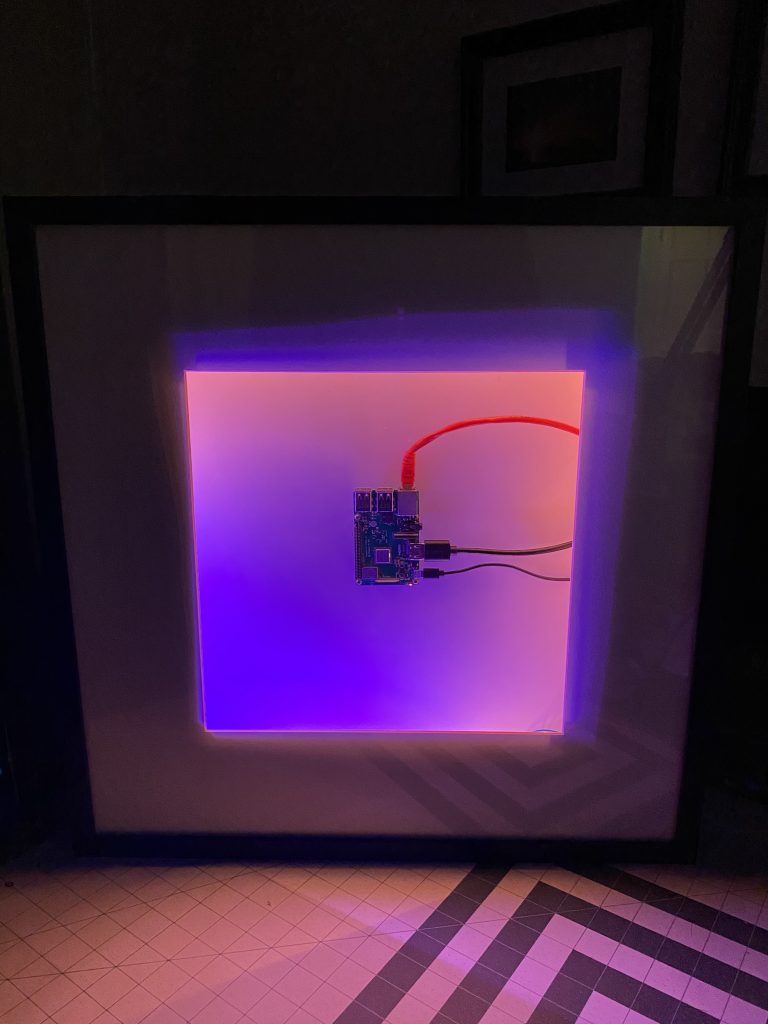
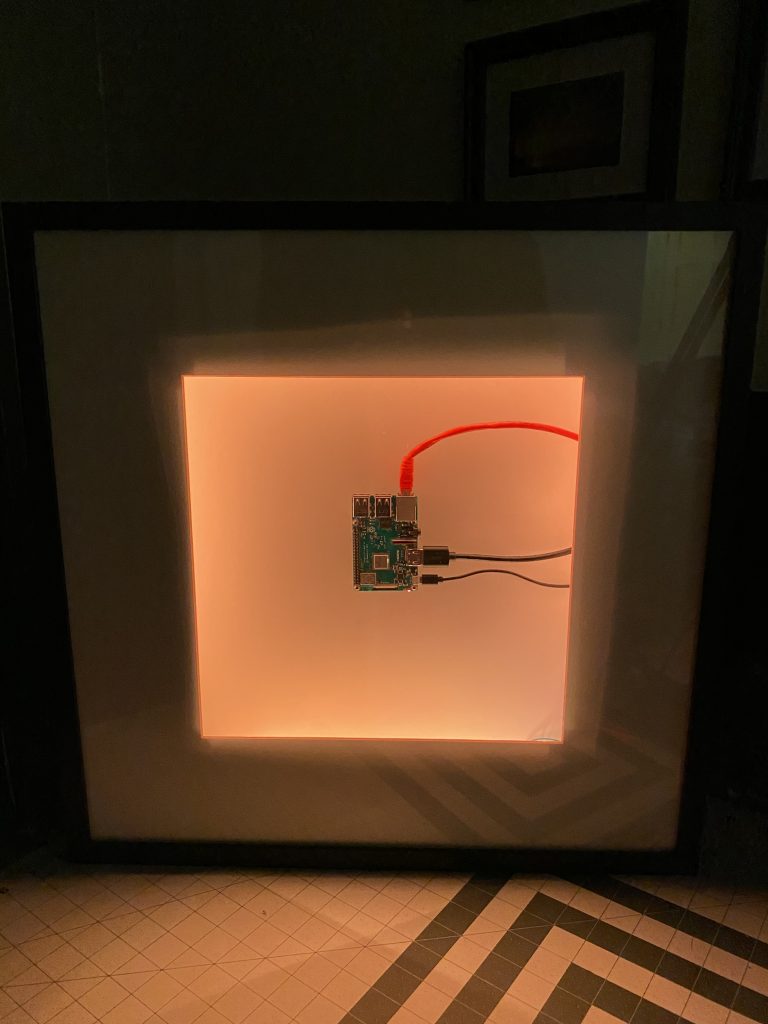
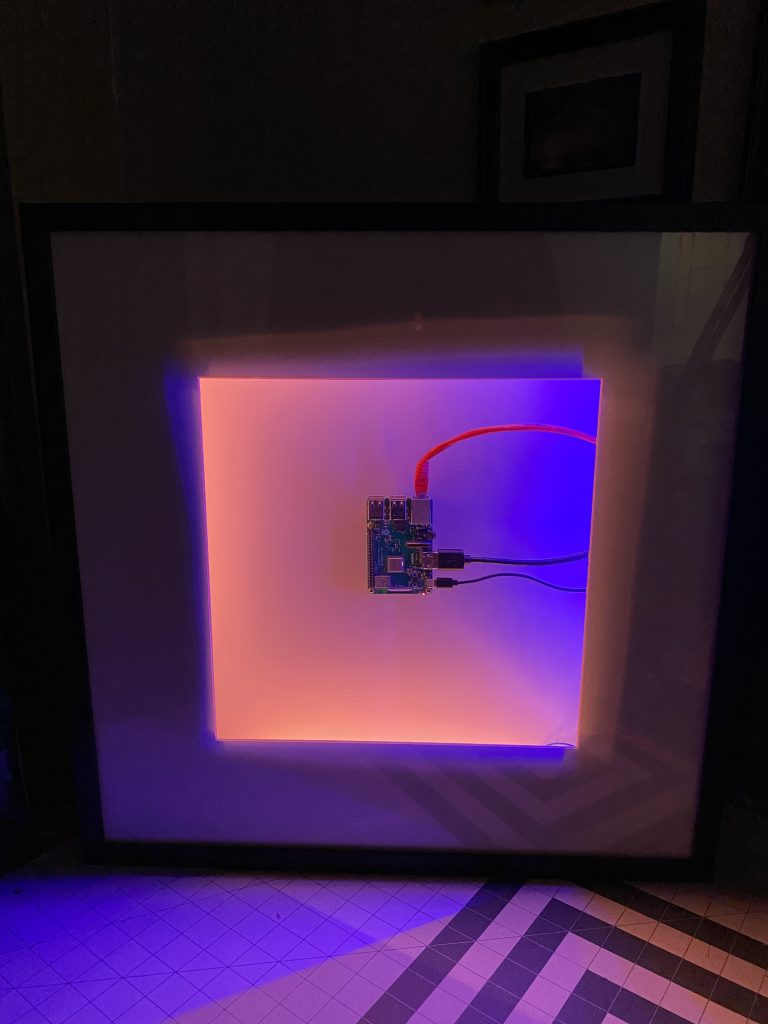
Ok. So now we have this beautiful beast all built out. Lets make it do a trick.
hehe… what kind of trick?
Are you 12? Seriously, what’s wrong with you?
Me? Im not the one talk to… you know what, nevermind. Continue.
Thank you.
So we have WLED installed on the Wemos D1 Mini. If you don’t know what WLED is, it is a beautifully written program for the d1 mini to do LED light control. HUGE shoutout to Aircookie for such a great piece of software! https://github.com/Aircoookie/WLED
Supports most LED light strip, but also give you some really awesome control over the LEDS. I have worked with it on some other projects including my neo-pixel LED christmas tree decoration I did this past christmas.
Aside from the really cool effects, the mobile apps ([ios][1] / [android][2]) but WLED also has support with tons of Home Automation Systems. I am currently using OpenHab so I will add a scheduled integration so it’s added as a “living room” light, in the group gLivingroomLights. This will automatically add it to the automation to turn on the LED’s with the rest of my living room lights which turn on 15 minutes after sunset each day. If we leave and turn off the lights, when we arrive back home, the lights automatically turn on when we pull in. The picture frame is now part of that. When it’s bedtime and the living room lights all turn off, so does the picture frame lights.
Since this is also a full color/dimmable type of light, it will automatically following follow the rest of the dimming controls for the livingroom lights, including integration into Kodi for the Cinema Vision home automation integration.
For Openhab you can integrate using the build in [binding][3]. Or via MQTT, http rest call.
For HomeAssistant you can integrate like [this][4].
The Results
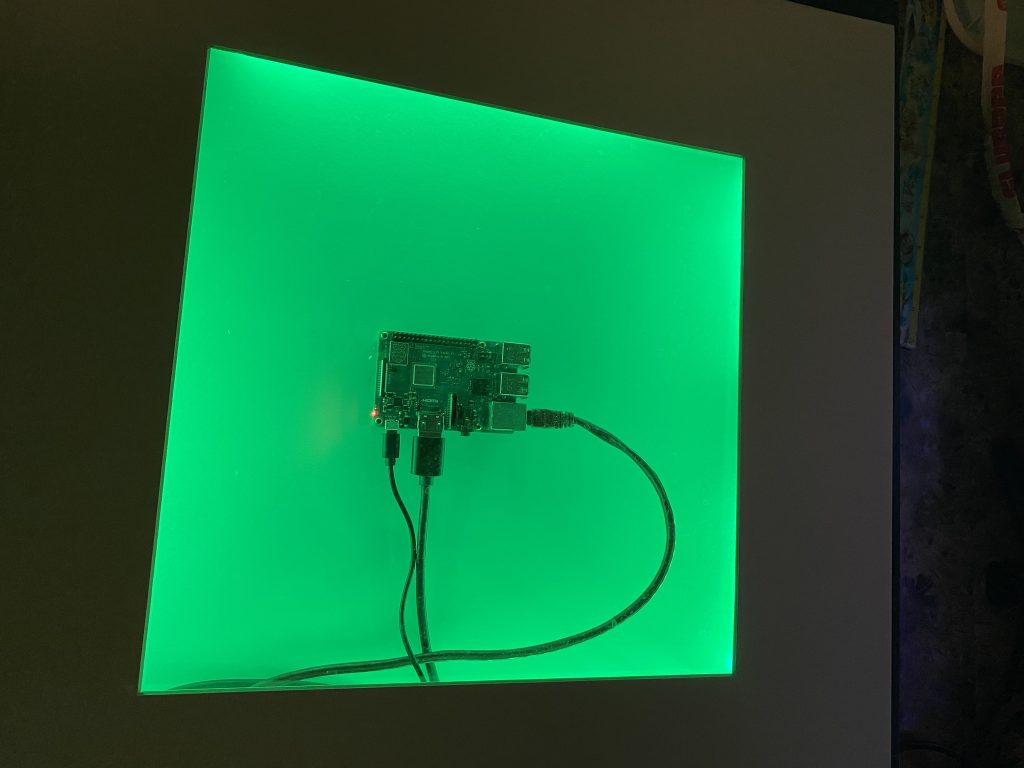
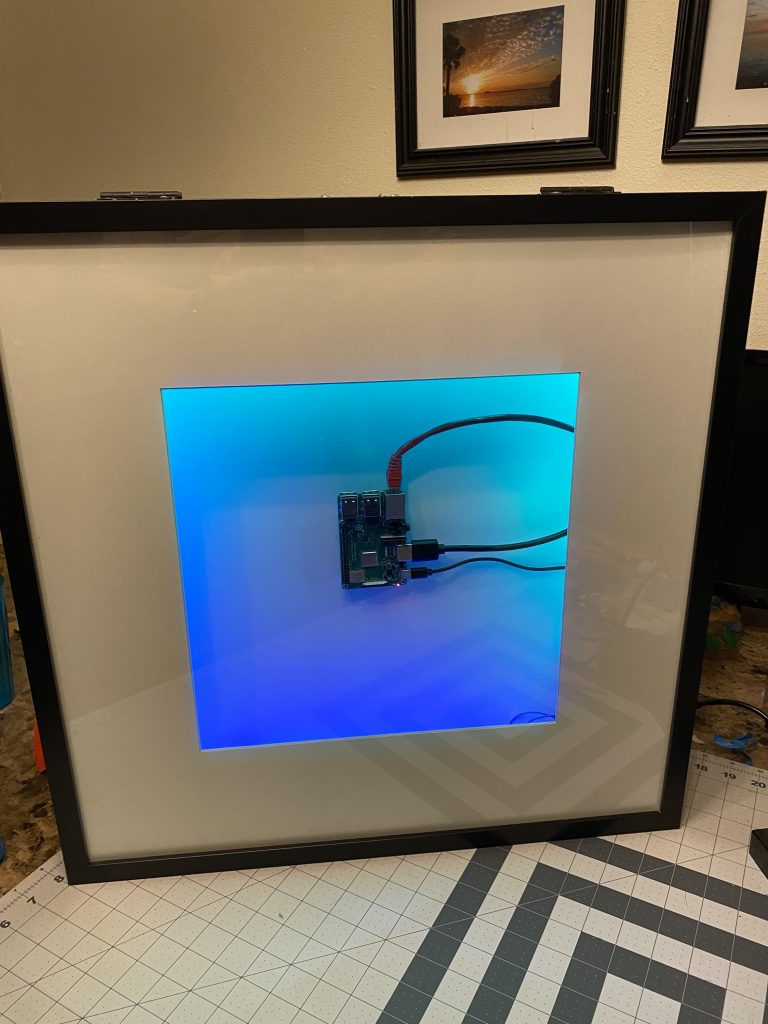
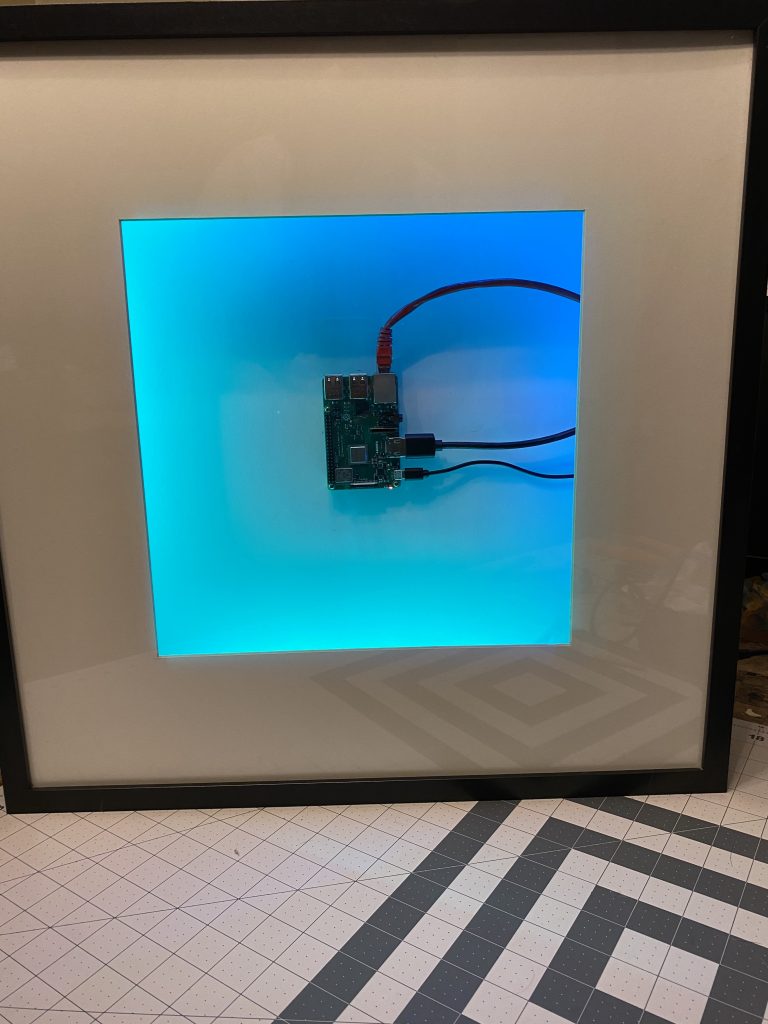
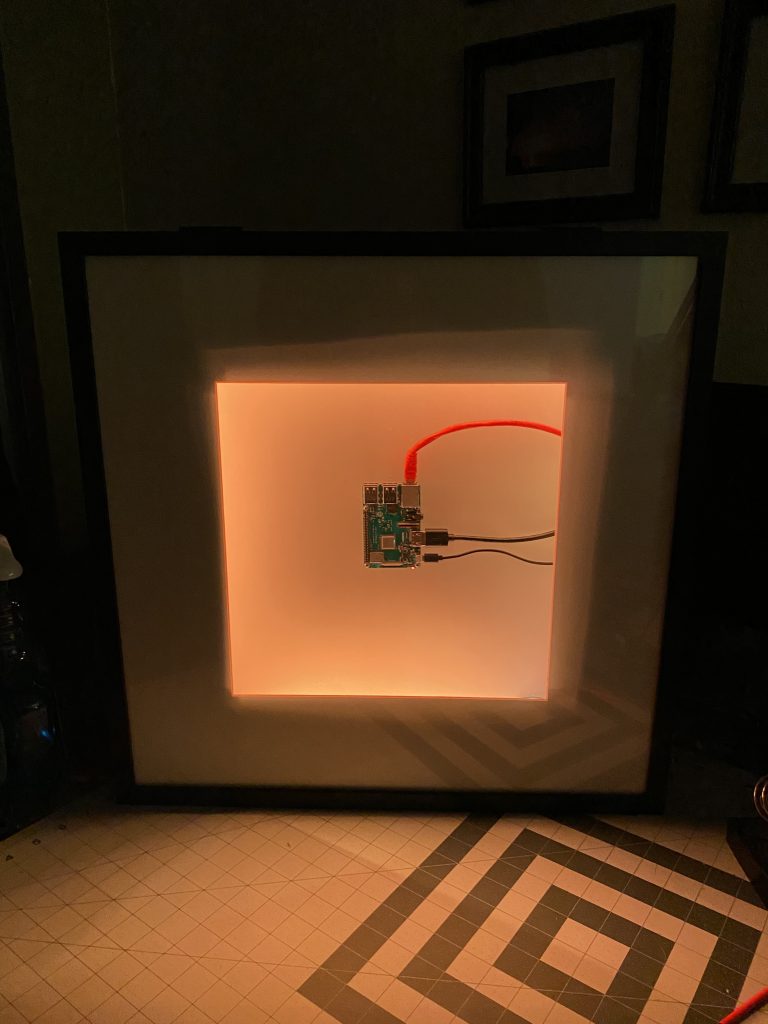
So what else does it do?
What do you mean what else does it do? It’s a Kodi Media player integrated in to plex with plexkodiconnect to sync everything up. It can play back all the media on the network, receive casted data and airplay.. what do you mean what else can it do?!
Yeah, what else can it do?
Home automation on screen notices and surveillance camera pop ups on motion?
Ok… that’s pretty good.
TLDR


Comments